Tues - Fri: 10am - 6pm, Sat 10am - 4pm & Sun - Mon: Closed
The first time I rendered lard it felt like I was tapping into my roots and getting back to the historical way of doing things. I was totally overwhelmed though. Here was this BIG chunk of fat that a friend of mine gave me and if I messed it up I had belittled the sacrifice that pig made for me.
After I got going though I realized it’s not that hard or complicated. I just wasn’t used to doing it so it felt strange.
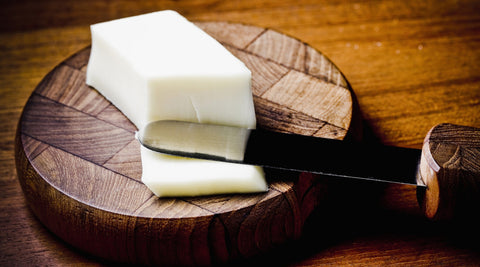
When you render lard you are removing the concentrated fat from all the cartilage and connective tissue holding it in place on the animal. This also helps it to become more shelf-stable as there are no meat pieces to rot left.
To render lard, back fat, or leaf lard start with pasture-raised pork from a farmer you trust. Fat from pasture-raised animals is higher in Vitamin D. Plus it tastes way better.
Trim any noticeable chunks of red meat off of your fat. Cut your fat into 1 - 2” cubes. I like to use my chicken scissors for this. I cut long strips off the main chunk of fat and then snip smaller chunks directly over my crockpot.
My crockpot holds about 8 quarts. It’s pretty big but I like to work in big batches. This will work just fine in a smaller slow cooker as well.
When your crockpot is about ¾ full of lard chunks add 1 cup of water. Place the lid on and set it on low. Low and slow is the trick here.
Come back to your lard around the 4-hour mark. Give it a stir. There should be bubbling chunks at the top. You can take off some lard at this point if you are feeling froggy, but I usually wait.
At 6 hours you should be about finished rendering. You can tell you are done rendering when it looks like the cracklins floating are starting to get brown and to fry.
Grab your fine mesh handled colander, big measuring bowl (I use this because it has a spout I can pour from), mason jars and their lids, big soup spoon, as well as a metal canning funnel if desired. Rest the colander over your measuring bowl, scoop up the golden liquid to strain it.
Keep going until all that is left is the cracklins. Safely remove them and place a plate and strain the rest of the liquid.

From your measuring bowl, you will be able to pour into a mason jar. You can use a METAL funnel here if you feel like you might dribble in your pour.
While the lard is still blazing hot and liquid, put your sealable lid and ring on. Leave the jars out to cool on the counter with a little space in between them. You should hear a “POP” over the next couple of hours as they cool. That’s how you know your jar has sealed and it’s safe to store on the shelf for a while.
And there you go! Now you are ready to do so many more homsteady things like condition a cast iron skillet, make soaps or candles, or simply saute your veggies with a healthier fat that has a higher burning point. Enjoy!
If you found this useful I'd love it if you would share this blog with someone you think would enjoy this as well.